Windows AD Lab on UTM
This lab walks through the steps I took to build a basic Active Directory (AD) lab environment using Windows Server 2022 as the Domain Controller (DC) and Windows 10 as the client. Everything was done inside UTM. In a later post, I will cover joining a Linux client to this Windows server.
Setting up the virtual machines
I downloaded the Windows Server 2022 and Windows 10 Enterprise ISO files from Microsoft Evaluation Center. I used to run this lab on VirtualBox on my 2019 Intel MacBook Pro, but I spilled a glass of margaritas on that computer. VirtualBox does not work well on Apple Silicon, so I switched to UTM. Do not drink near your laptop guys.
Host environment
- MacBook Pro (M1 Pro chip)
- UTM latest stable version
Creating the domain controller in UTM
- Create the DC (Windows Server 2022).
- UTM > Create a New Virtual Machine > Emulate. UTM must use Emulate because the M1 Pro ARM chip cannot run x86 Windows Server directly.
- Settings:
- Operating System: Windows
- Machine: Intel ICH9 based PC (2009, x86_64)
- Memory: 4 GB (I used 12 GB on a 32 GB host)
- CPU cores: 2
- Uncheck “Install Windows 10 or higher”
- Attach the Windows Server 2022 ISO
- UEFI Boot
- Storage: 100 GB
- Networking: Settings > Network. Select Shared Network if you want Internet access. Otherwise select Host Only. I used Host Only for this lab. Then start the VM.
Install Windows Server 2022
- When you see “Press any key to boot from CD/DVD…”, press Enter or Space.
- Select Windows Server 2022 Standard or Evaluation Center. Make sure it is Desktop Experience. Otherwise you will only get a CLI.
- Select Custom Install > select the unallocated drive > Next.
- After the reboots, set the Administrator password and finish.
The Emulate option is slow on Apple Silicon. Be patient. After install, unlock the server and continue with configuration: promote to a DC (AD DS and DNS), assign static IPs, and so on.
Configuring the server
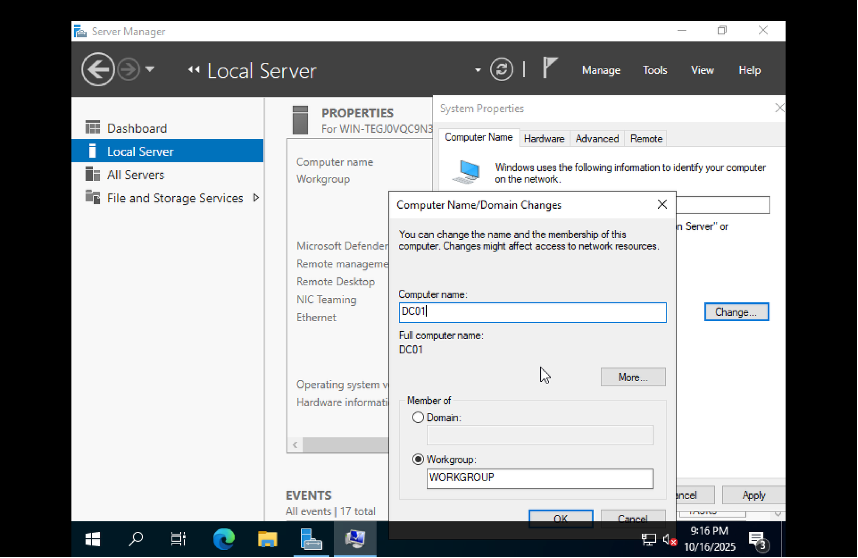
Server Manager should open on boot. If it does not, open it from search. Local Server > Computer name > Change. I used DC01. Restart when prompted.
Assign a static IP
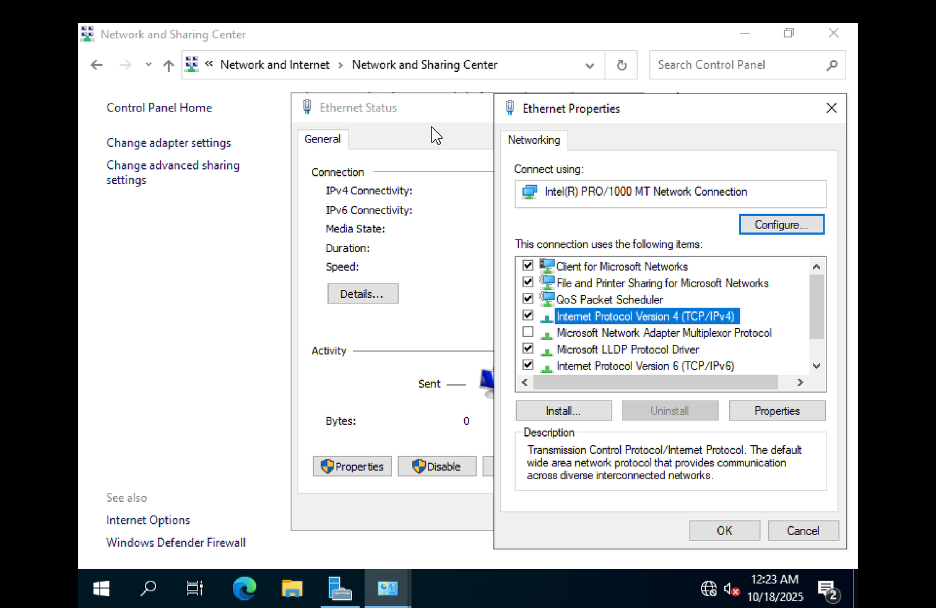
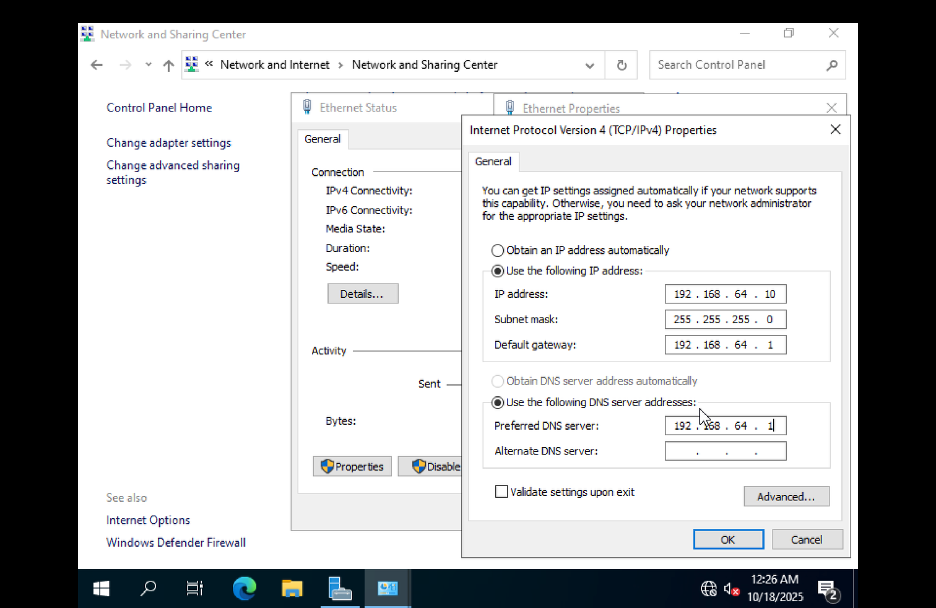
Control Panel > Network and Internet > Network and Sharing Center > Connections: Ethernet > Properties > Internet Protocol Version 4 (TCP/IPv4) > Properties. Enter static IP, subnet mask, and preferred DNS. Reboot if prompted.
Install AD DS, DNS, and DHCP
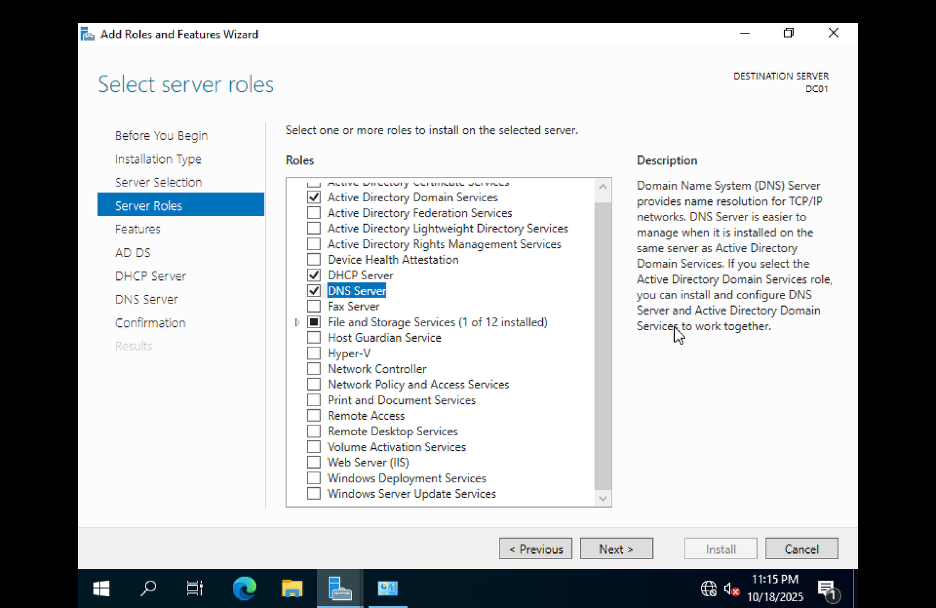
Server Manager > Manage > Add Roles and Features.
- Installation type: Role based or feature based
- Server selection: select this server
- Server roles: check Active Directory Domain Services, DNS Server, and DHCP Server
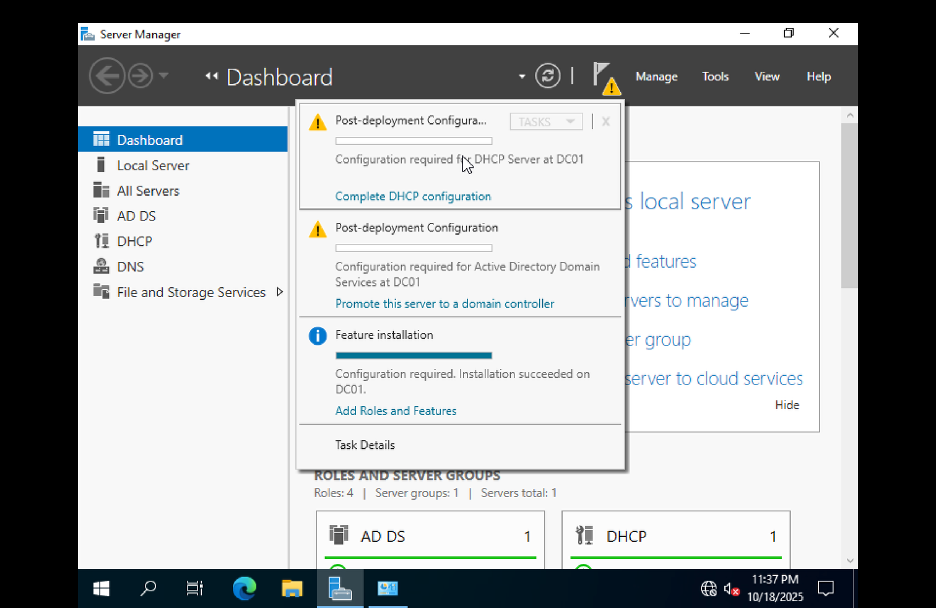
Click Next to the end and install. When it finishes, click the flag with the yellow alert to configure the new roles.
Promote the server to domain controller
- Add a new forest and set the root domain. I used
damibuilds.com. - Use the same Administrator password.
- Run the prerequisite check and install. Ignore delegation warnings if they appear. The system restarts and shows
damibuilds\\Administratorat login.

DHCP configuration
In Server Manager, complete the DHCP post install configuration. Commit and close. Then authorize the DHCP server.
Server Manager > Tools > DHCP > expand server > IPv4 > right click server > Authorize.
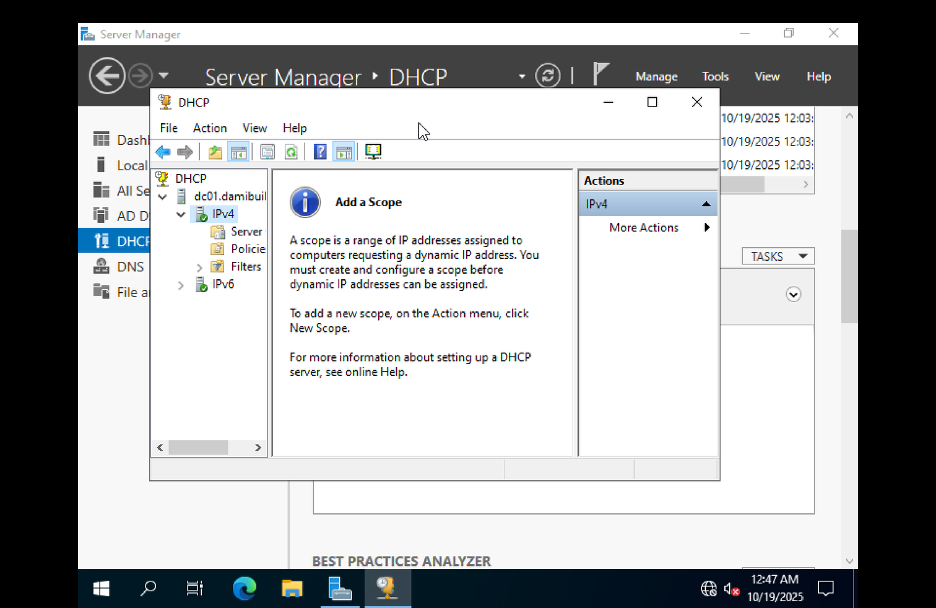
Create a scope
- Right click IPv4 > New Scope.
- Start IP: 192.168.64.50 > End IP: 192.168.64.100.
- Subnet mask: 255.255.255.0.
- Skip exclusions. Lease duration: 8 days.
- Options: Yes.
- Router: leave blank for an isolated lab.
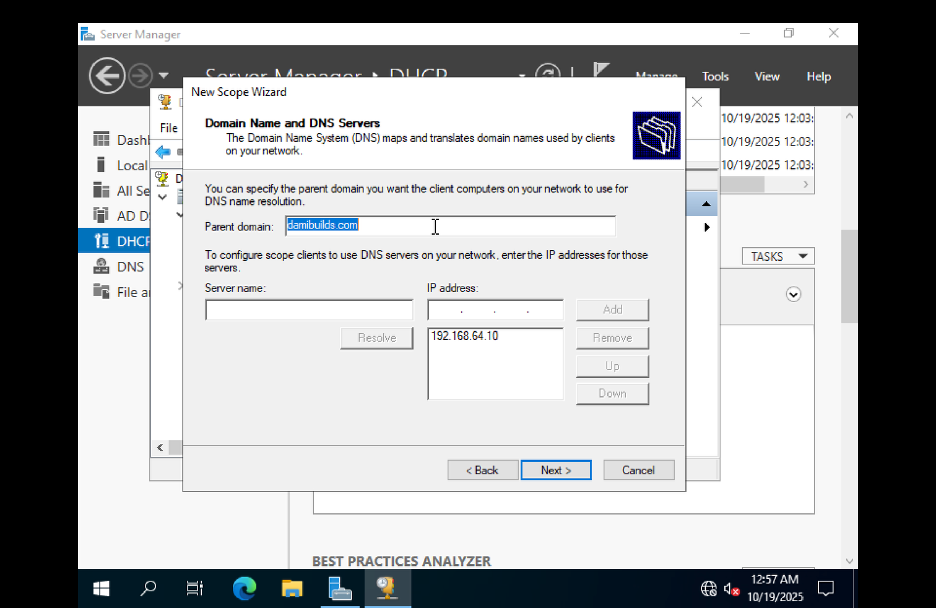
- Domain name and DNS server: enter your domain and DNS IP.
- Skip WINS. Activate scope now.


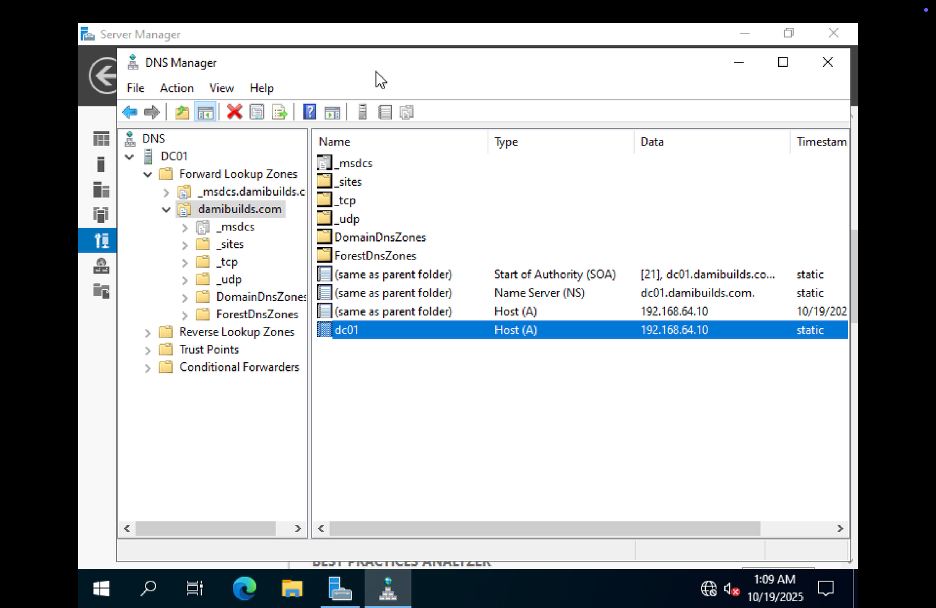
DNS check
This is mostly set during AD promotion. To verify: Server Manager > Tools > DNS > Forward Lookup Zones > damibuilds.com. Confirm an A record for DC01 points to 192.168.64.10.
If missing, create a Reverse Lookup Zone for 192.168.64, add a PTR for DC01, then test:
nslookup dc01.damibuilds.com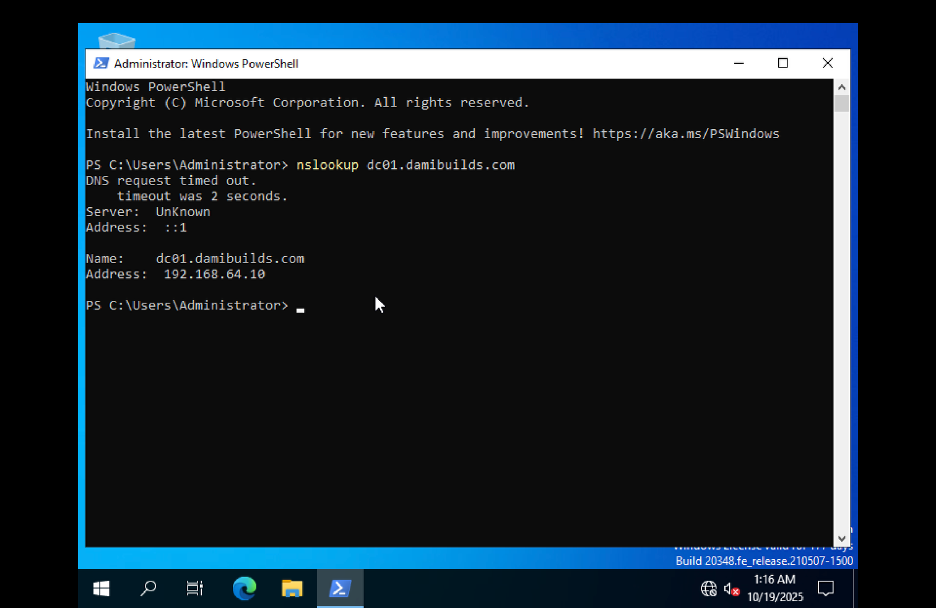
Wrap up
You now have a Windows Server 2022 Domain Controller with DNS and DHCP configured. Next I will join a Windows client and later a Linux client to this domain and cover file sharing and basic policy.